

Self-Hosting Gemma 4 on Kubernetes with KServe and vLLM
How we ran the Gemma 4 31B instruction-tuned model on a single A100 80GB GPU using KServe and vLLM, including the custom runtime, PVC setup, tuning flags, verification, monitoring, and troubleshooting notes.
Google released Gemma 4 this week, an open-weights model with impressive quality for its size, making it a great candidate for self-hosting. We got the 31B instruction-tuned variant running on a single A100 80GB GPU using KServe and vLLM.
If you're running a released version of KServe, you'll likely hit issues getting Gemma 4 to work out of the box. The default serving runtimes ship with older versions of Transformers and vLLM that don't yet support the Gemma 4 architecture. Here's how we worked around that.
Building a Custom Serving Runtime Image
We need to build a custom container image based on vLLM with an upgraded transformers library.
FROM docker.io/vllm/vllm-openai:nightly-e80e633927ab11570cc4d07a55e5420d05c7fe99
RUN pip install --upgrade transformers==5.5.2
We're using a nightly vLLM image here because the latest stable release didn't include Gemma 4 support yet. Once vLLM ships a tagged release with Gemma 4 support, check the vLLM releases page and switch to it.
Build and push it to a registry reachable from your cluster:
export TAG=$(date +%Y%m%d-%H%M%S)
docker build -t your-registry.example.com/pk-vllm-openai:$TAG .
docker push your-registry.example.com/pk-vllm-openai:$TAG
Creating the ClusterServingRuntime
With the image pushed, create a ClusterServingRuntime that uses it. This tells KServe how to run your custom vLLM container:
apiVersion: serving.kserve.io/v1alpha1
kind: ClusterServingRuntime
metadata:
  name: vllm-gemma4-runtime
spec:
  annotations:
    prometheus.kserve.io/path: /metrics
    prometheus.kserve.io/port: "8080"
  containers:
  - name: kserve-container
    image: your-registry.example.com/pk-vllm-openai:<TAG>
    command: # Launch vLLM's OpenAI-compatible API server directly,
    # bypassing the default KServe model server entrypoint.
    # This gives us full control over vLLM's serving config
    # and exposes the OpenAI-compatible /v1/chat/completions endpoint.
    - python3
    - -m
    - vllm.entrypoints.openai.api_server
    args:
    - --model=/mnt/models # KServe mounts the model from storageUri to /mnt/models
    - --port=8080 # KServe routes traffic to port 8080 by default
    resources:
      limits:
        cpu: "1"
        memory: 2Gi
      requests:
        cpu: "1"
        memory: 2Gi
    securityContext:
      allowPrivilegeEscalation: false
      capabilities:
        drop:
        - ALL
      privileged: false
    volumeMounts:
    - mountPath: /dev/shm
      name: devshm
  hostIPC: false
  protocolVersions:
  - v2
  - v1
  supportedModelFormats:
  - autoSelect: false
    name: vllm
    priority: 1
    version: "1"
  volumes:
  - emptyDir:
      medium: Memory
    name: devshm
Apply it:
kubectl apply -f cluster-serving-runtime.yamlNote the /dev/shm volume mount. vLLM uses shared memory for inter-process communication, and the default 64MB in most container runtimes is not enough. Mounting an emptyDir with medium: Memory gives vLLM access to the full host memory as shared memory.
Downloading the Model
The model weights need to be accessible to the serving pod. We recommend downloading them to a PVC.
The easiest approach on prokube.ai is to spin up a notebook with about 10GB of memory and a roughly 70GB PVC attached, then use the Hugging Face CLI to pull the model:
# Install the Hugging Face CLI
curl -LsSf https://hf.co/cli/install.sh | bash

# Optional: set a token to avoid rate limits
# export HF_TOKEN=hf_********

# Download the model to a directory on your PVC
mkdir models
hf download google/gemma-4-31B-it --local-dir models
Once the download completes, shut down the notebook or pod. You don't want it consuming resources while the model is being served.
Scaling warning: If you plan to run more than one replica, your PVC must support ReadWriteMany access mode, for example NFS, Azure Files, or CephFS. The default ReadWriteOnce PVC will prevent additional pods from mounting the volume if they run on other nodes.
Deploying the InferenceService
Now create the InferenceService that ties everything together, pointing at your custom runtime and the PVC where the model weights live:
apiVersion: serving.kserve.io/v1beta1
kind: InferenceService
metadata:
  name: gemma-4-31b-it
  namespace: llm-serving
  labels:
    litellm.ai/sync: 'true' # prokube.ai: auto-sync this model to LiteLLM proxy
    prokube.ai/model-type: text-generation # prokube.ai: classifies the model type for the platform UI
  annotations:
    serving.kserve.io/enable-openai-endpoint: "true"
spec:
  predictor:
    minReplicas: 1
    maxReplicas: 1
    model:
      runtime: vllm-gemma4-runtime
      modelFormat:
        name: vllm
      storageUri: "pvc://gemma-workspace/models/"
      args:
        - --gpu-memory-utilization=0.9
        - --max-model-len=114688
        - --enable-prefix-caching
        - --enable-chunked-prefill
        - --served-model-name=gemma-4-31b-it
        - --dtype=bfloat16
        - --kv-cache-dtype=fp8
        - --enable-auto-tool-choice
        - --tool-call-parser=hermes
        - --root-path=/openai
      resources:
        requests:
          cpu: '4'
          memory: 32Gi
        limits:
          cpu: '8'
          memory: 64Gi
          nvidia.com/gpu: '1'
GPU assignment: You do not need to set NVIDIA_VISIBLE_DEVICES manually. The NVIDIA Device Plugin for Kubernetes handles GPU assignment automatically when you request nvidia.com/gpu in the resource limits. Setting a specific GPU UUID ties the deployment to a single node and breaks portability.
Tuning Reference
A quick walkthrough of the args above. The most important one is --kv-cache-dtype=fp8, which stores the KV cache in 8-bit floats instead of 16-bit. This roughly halves the memory needed per token and is what makes a 114k context window feasible on a single 80GB GPU.
Paired with --max-model-len=114688, which caps the context window upfront so vLLM can plan its memory budget at startup and avoid runtime OOM crashes, you get a stable, large-context deployment.
For throughput, --enable-prefix-caching reuses the KV cache across requests that share a common prefix, and --enable-chunked-prefill lets vLLM interleave long-prompt processing with ongoing decode steps so a single big request does not block everyone else.
For tool calling, --enable-auto-tool-choice together with --tool-call-parser=hermes enables OpenAI-compatible function calling and tells vLLM how to parse Gemma 4's specific tool-call output format. Finally, --root-path=/openai is a KServe-specific requirement: KServe routes OpenAI-compatible traffic under the /openai prefix, and vLLM needs to know about it to generate correct URLs.
Scaling with Multiple GPUs
If you have multiple GPUs available, add --tensor-parallel-size=<num_gpus> to the args and increase the nvidia.com/gpu limit accordingly. This not only speeds up inference but also frees up VRAM for a larger KV cache, allowing you to serve more concurrent requests or increase the context length.
For scaling beyond a single replica, KServe supports maxReplicas out of the box. However, naively load-balancing across replicas can lead to redundant KV cache computation. We'll cover KV-cache-aware routing for multi-replica deployments in an upcoming post.
Apply it and wait for the pod to come up:
kubectl apply -f inference-service.yaml
kubectl get inferenceservice gemma-4-31b-it -n llm-serving -w
Verification
Once the status shows Ready, verify the endpoint is working with a smoke test:
# Get the endpoint URL (adjust based on your KServe ingress setup)
export ENDPOINT=$(kubectl get inferenceservice gemma-4-31b-it -n llm-serving   -o jsonpath='{.status.url}')

curl -s "$ENDPOINT/openai/v1/chat/completions"   -H "Content-Type: application/json"   -d '{
    "model": "gemma-4-31b-it",
    "messages": [{"role": "user", "content": "Hello! What model are you?"}],
    "max_tokens": 64
  }' | python3 -m json.tool
You should see a JSON response with the model's reply.
Monitoring
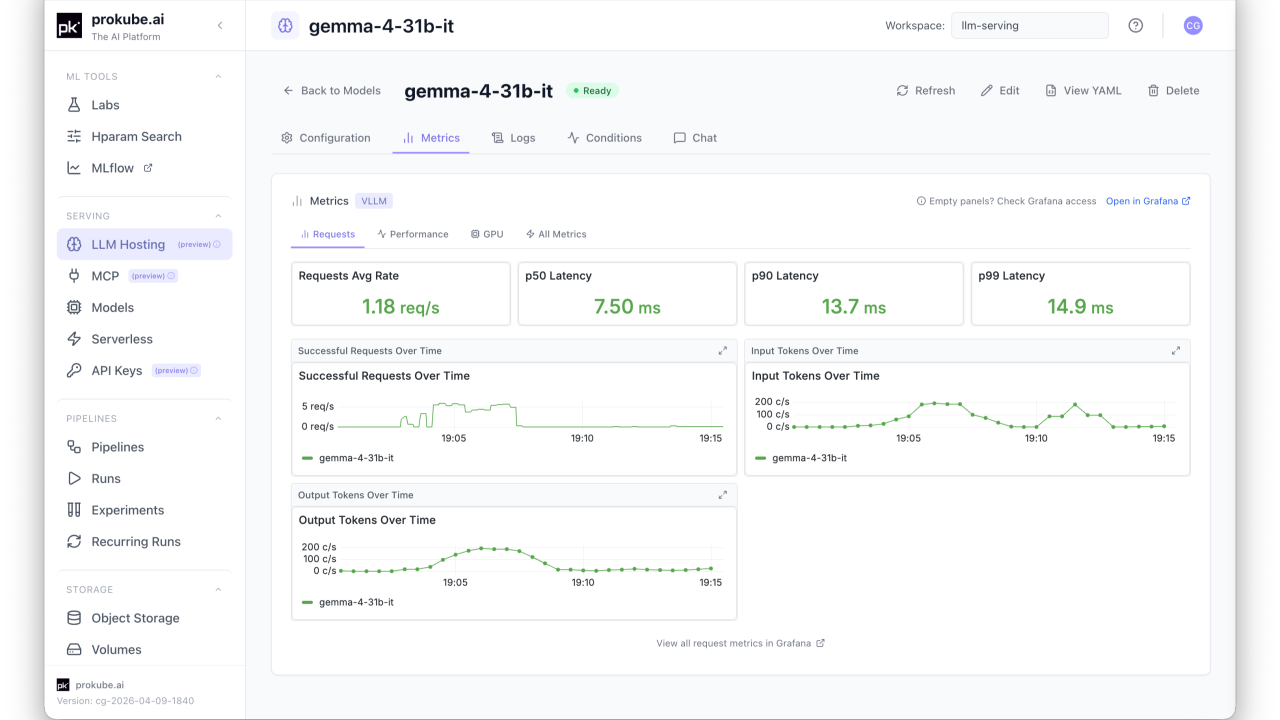
The ClusterServingRuntime already includes Prometheus annotations, so metrics are scraped automatically if you have a Prometheus instance watching your cluster. Key vLLM metrics to watch:
vllm:avg_prompt_throughput_tokens_per_s: how fast prompts are being processed. A drop may indicate GPU saturation.vllm:avg_generation_throughput_tokens_per_s: token generation speed, the main indicator of user-perceived latency.vllm:gpu_cache_usage_perc: KV cache utilization. If this stays near 100%, consider reducing--max-model-lenor adding GPUs.vllm:num_requests_waiting: queue depth. Sustained high values mean you need more replicas or faster hardware.
Troubleshooting
CUDA Out of Memory
If the pod crashes with a CUDA OOM error, try lowering --gpu-memory-utilization to 0.8 or reducing --max-model-len. The 31B model at bfloat16 uses about 62GB of VRAM for weights alone, so a 114k context window is tight on a single 80GB GPU.
CrashLoopBackOff common causes
- PVC not mounted correctly. Check
kubectl describe podfor mount errors. - Incompatible transformers version in the custom image. Verify with
kubectl exec <pod> -- pip show transformers. - Model files corrupted or incomplete. Re-download and check file sizes against the Hugging Face model card.
Slow startup
First-time startup can take several minutes as vLLM loads the model weights into GPU memory. If using a PVC, the initial storageUri copy to /mnt/models adds additional time. Check pod logs with kubectl logs -f <pod> -n llm-serving to see progress.
Tool calling not working
Make sure both --enable-auto-tool-choice and --tool-call-parser=hermes are set. If you're using an OpenAI client library, ensure you're sending the tools parameter in the chat completion request, not the deprecated functions format.